
Replacing A Frame Slats
20 Oct 2008
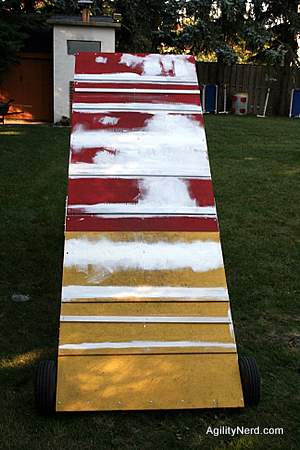
With all the rain at the end of this summer my A Frame became too decrepit to put off repairing. It didn’t need to be fully “re-skinned” (have all the wood replaced), only three of the slats were rotten. But the whole A Frame needed a fresh coat of paint before winter set in and did more damage. So I thought I’d take some photos of the process in case they helped someone out.
Rotten Slat
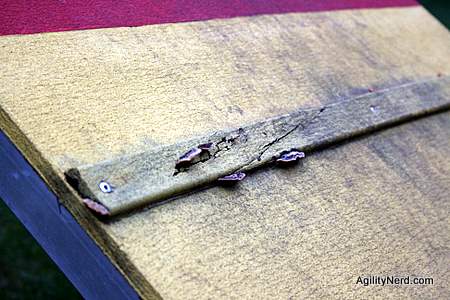
After eight years, the last three outdoors, three of the slats on my A Frame really needed replacement. This slat was the worst and most "dramatic" of them.
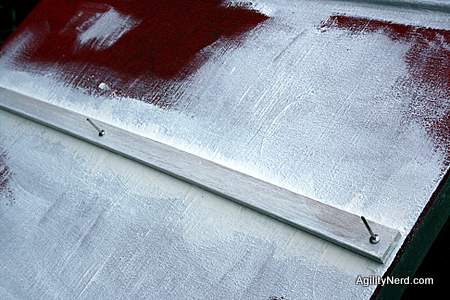
Drilling Out Old Pop Rivet
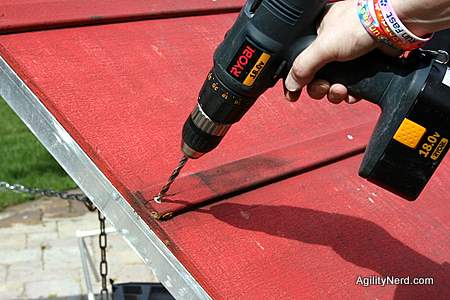
My slats were held on with pop rivets that went through the slat, skin and into the aluminum frame. To remove them select a drill bit that is the size recommended for your replacement pop rivets. Carefully drill all the way through the rivet to remove it from the A Frame itself. You don't want to make the hole any larger or your new rivet may not expand enough to hold. If yours are screwed on unscrew them.
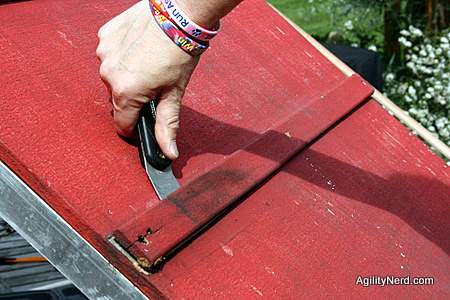
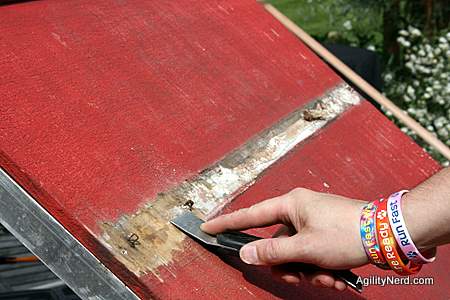
Break the Paint/Caulk Seal
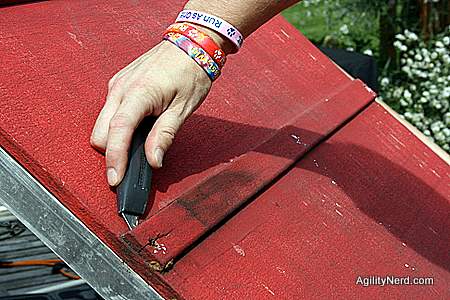
I used a sharp box cutter to break the paint and caulk seal on the top, bottom, and sides of each slat I was removing. Be careful not to cut into the skin of the A Frame.
Gently Separate Slat From A Frame
I used a putty knife to slide under each slat along the whole length before prying the old slat off. There were also some staples that held the slat in place.
Clean Up The Surface
Use the putty knife to remove any loose paint, caulk, glue, or rotten wood from under the slat. You want a clean dry surface before continuing. I left the A Frame out in the sun for a couple days to make certain the wood under the slat was completely dry.
Repair Materials
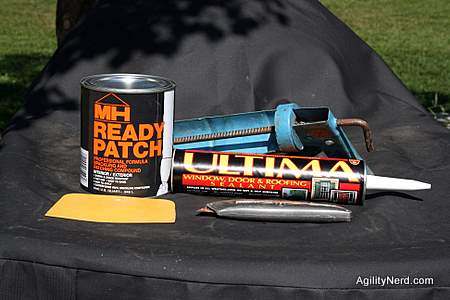
Make sure you use exterior grade, paintable materials to patch and caulk the new slats in place. You don't want to leave any gaps in the paint surface to allow water to seep in and start rotting the wood. Of course follow the manufacturers directions.
Applying Patching Compound
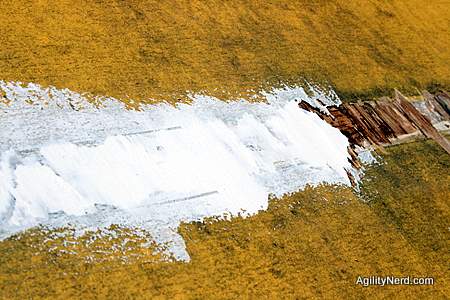
Push the patching compound firmly into any depressions in the wood and level the surface with your putty knife or spatula. Make sure you don't fill up the pop rivet holes!
Marking Location of Holes in New Slat
I had originally planned to pre-drill the slats all the same. Then I found the pop rivets weren't in exactly the same location on each slat. So after cutting the slats to size I put the pop rivets in their holes and marked each slat with a pencil where the rivets were located. Then drilled the holes.
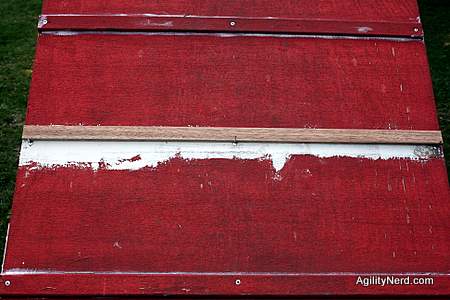
Caulked and Primed
Once the slats were prepared I caulked in the existing slats where there were gaps. Then used exterior primer on the new slats (both sides), the patched sections and any bare wood. Unlike me you might want to use a dark tinted primer so you won't need a lot of color coats to hide the lighter primer.
Pop Riveting A New Slat
Position the pop rivets in all the holes in the slat (3 in my case) before crimping them to keep the slat properly aligned.
Painting Supplies
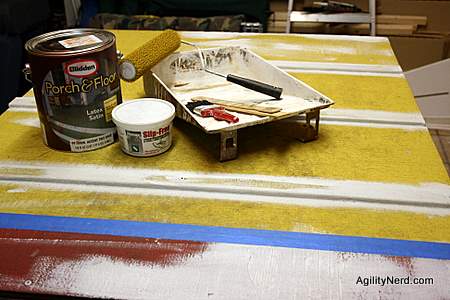
I used exterior satin porch paint (not a gloss finish). Test your old paint by rubbing a rag with some paint thinner on it. If the color comes off on the rag you should use oil based paint. Otherwise use exterior acrylic paint. Use painter's masking tape to separate the colors and protect the frame from excess paint. Go over the whole surface with a wire brush to remove any dirt. A 3/8 in nap roller spreads the paint quickly. Wrap it in a plastic bag and put it in the refrigerator to keep from having to clean it until your are done. Sprinkle sand/grit over the first wet coat and let dry before the next coat.
Letting It Dry
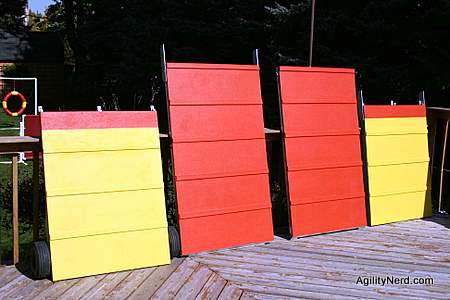
After applying 3-4 coats of each color and letting them dry between coats I left the finished pieces (mine is a four piece A Frame) sit in the sun for a week before reassembly.
All Done

Now it looks so nice I don't want to use it! On to painting the teeter and table...
If you enjoyed this article won't you please:  Thanks!