
DIY Chute
11 Apr 2007
Obsolete Article
Heads up! This article is old and I don't think its content is useful anymore. It's here for historical reference only.
Well I’ve had the parts for almost a year now and I finally made time to put together my own Chute. This isn’t exactly a “how to” article but for someone who is reasonably handy you should be able to use my experiences to make your own chute. The usual cautions apply - use common sense so you don’t hurt yourself doing this.
Parts
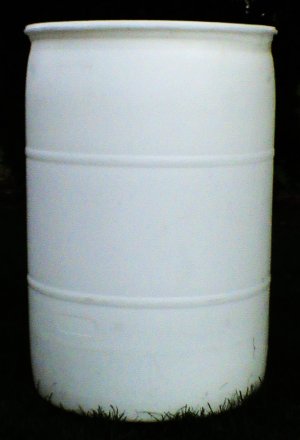
Barrel
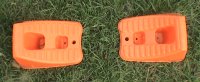
Wheel Chocks
One of the toughest aspects of this project was getting the barrel itself. For most US agility organizations the barrel has to be 24 inches in diameter and 24 to 36 inches long. The most common barrels I’ve seen are the 55 gallon (“poly”) plastic barrels used to hold car wash soap or chemicals. I tried for a long time to get one from a car wash supply company but since these barrels are reused they never had any old or damaged ones that I could buy from them. I asked around agility friends and it turns out Marty was able to get me one for free! Thank you again Marty! Of course with a used barrel you need to figure out what it contained before you got it and clean it very, very thoroughly. Most of these barrels seem to be blue or white in color. (I just ran this Google query and found some places that sell new and reconditioned drums)
I bought plastic wheel chocks (used to keep cars and trailers from rolling) for about $5 a pair at Walmart to keep the barrel from rolling from side to side. These are fine if you are planning to use tunnel holders/sand bags to keep your chute in place. I was looking for heavy rubber wheel chocks that would keep the barrel from rolling and weigh enough so I wouldn’t have to sandbag the chute but I couldn’t find any that wouldn’t need special ordering and cost significant money.
I also had eight 1/4” x 1 inch carriage bolts, nuts and large washers lying around from other projects that I used to attach the wheel chocks to the barrel. Use carriage bolts since they have domed heads on them; the domed head goes on the inside of the barrel and is covered by the sandpaper tape used for traction.
I had ordered a pre made chute from NTI global in red and yellow to match my other equipment. I got a 10 foot chute so the overall length of the fabric and barrel would fit AKC regulations (12 foot total length).
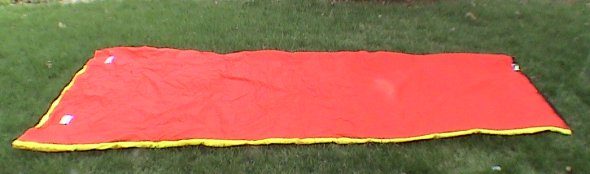
Chute Fabric
You’ll need a length of foam pipe insulation for putting around the entrance of the barrel; I like the kind that has an adhesive strip along one side. Lastly I bought a roll of 4 inch wide traction tape used for stair treads at the hardware store.
Tools
I used the following tools:
- Hand drywall saw or other small aggressively toothed hand saw
- Drill with 1/4 inch bit
- Jig saw (helpful but not necessary)
- Pliers, or wrench to fit 1/4 in nuts
- Coarse sandpaper (60 grit)
Building the Chute
If you look at the barrel one end has one or more filler holes and the other end doesn’t. If you look at the side of the barrel at the filler hole end you’ll see that it flares out slightly. This flared end will hold the chute fabric on when you tighten the belt in the fabric. Consequently, you don’t want to cut off that end of the barrel.
What you want to do is remove the top of the barrel and leave the rim of the barrel intact. Just like you used a giant can opener to take the top of the barrel off. So take your hand saw and insert it into the filler hole in the end of the barrel and saw toward the rim of the barrel. Start curving your cut so you end up cutting parallel to the rim of the barrel just like a can opener would. You need to get close enough to the inside of the flare without cutting into it or leaving any of the top behind. This is one of the hardest parts of this project. Go slowly and keep looking at what your are doing. (Sorry no photos… I actually did this part last fall)
If you have a long enough blade for your jig saw you could use that; but I ended up cutting this by hand. The plastic is pretty soft and I didn’t want to screw up the cut.
I then hand sanded the cut surface to remove saw marks, excess material, and leave smooth surface. This took a while and generates a lot of soft plastic dust. I’d do this outside and it is probably best to wear a dust mask.
Now cut the bottom of the barrel off. This time you can cut from the side since there is no flare you need to preserve. My barrel had a molding seam about 2 inches from the bottom all the way around. I took my drill made a hole big enough for the jig saw blade and then followed the seam all the way around the barrel. I found it was easiest if put the barrel on its side and pushed it up against the wall while cutting it and rotating the barrel under the saw. You could do this with a hand saw also.
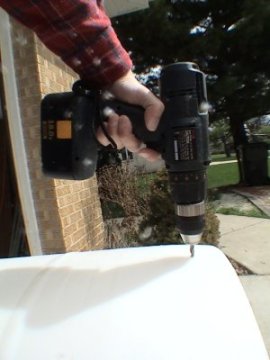 Drilling Hole For Starting Jig Saw | 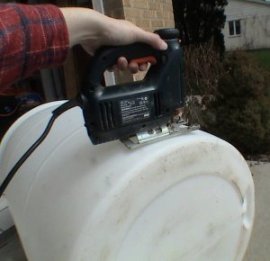 Cutting Off Barrel Bottom With Jig Saw |
For me the hardest part of this project was attaching the wheel chocks to the barrel. My barrel wasn’t perfectly round so I set it on the ground so it was taller rather than wider; figuring over time gravity would flatten it slightly. You need all four chocks to be flat on the ground and touching the barrel along their length. I ended up using two ribbed sections on the barrel to locate the chocks front to back and slid the chocks under the barrel just enough so they fully contacted the barrel sides.
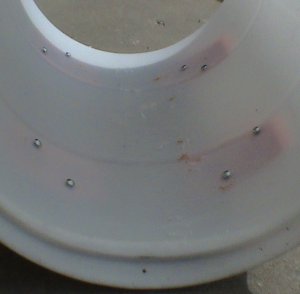
Inside of Barrel Showing Bolt Heads
So how then do you drill the holes in the right place? I tried to mark around the chocks on the side of the barrel so I could flip it over and locate the chocks correctly and then drill through them but that wasn’t too successful. I’m sure someone out in the blog-o-sphere has a good answer… I just punted. I set the barrel and chocks on the floor and aligned everything just like it would be when it was finally assembled. The barrel was sufficiently translucent that I could just make out the shape of the chocks from the inside of the barrel. I drilled through the barrel from the inside with the drill bit perpendicular to the barrel side. As I made a hole I put the bolt into the hole to keep everything from moving as I drilled the next hole. I made two holes for each chock.
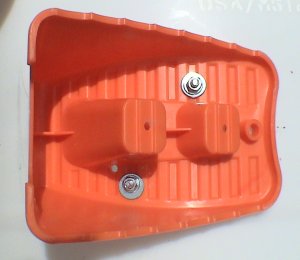
Bottom of Chock Showing Nuts
Once all the holes were drilled and the bolts held the chocks roughly in place I could flip the barrel on its side. Then I saw if I actually drilled the holes into a good place in each chock. If not I could drill from the chock side into the barrel to relocate the bolts. I only had to fix three of the eight holes (got lucky). Since the bolt heads and holes will be covered by the traction tape these extra holes don’t cause a problem.
I then put a large flat washer on each bolt along with a nut and tightened the bolts until the heads of the bolts were flush with the inside of the barrel. You don’t want to use regular hex bolts or leave the bolt heads sticking up since the dogs might step on them.
Barrel With Tape and Padding
Then I rinsed the barrel off with water to remove the plastic dust and brought everything inside to warm up (it was just above freezing outside when I did this project). Once everything was dry and at room temperature I cut strips of the traction tape so that it would go up the sides of the barrel at least 6 inches and taped it along the inside of the barrel. I got lucky with the tape, the roll was 180 inches long so seven strips 24 inches long fit nicely along the bottom of the barrel.
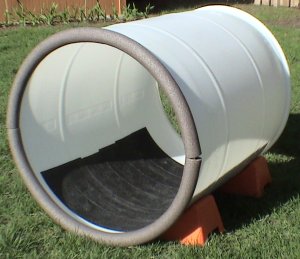
I cut the pipe insulation to length and put the slit edge around the non-flared end of the barrel. I put the adhesive side of the foam toward the inside of the barrel; hoping it would stay in place better with dogs brushing against it. Lastly I cinched the chute fabric onto the flared end of the barrel.
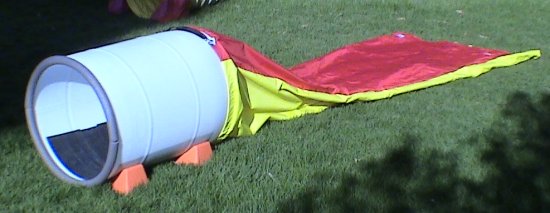
Finished Chute
Hopefully these notes will be of some use if you want to give this a try yourself.
If you enjoyed this article won't you please:  Thanks!