
Learning the Front Cross - Video
04 Apr 2005
The Front Cross is one of the building blocks of dog agility handling. It can be used on almost every agility course. It is also the foundation for a number of more complex handling movements (e.g. Reverse Flow Pivot and Half Cross).
In this article I’ll demonstrate using a Front Cross to change from one side of your dog to the other. Another other use of a Cross is to change your dog’s Lead Leg in order to initiate a turn. Here is my Front Cross definition.
Start Without Your Dog!
Many novice handlers are too self conscious to practice their handling movements without their dog. But please believe me that you’ll be more successful if you get the footwork drilled into your muscle memory before you add your dog into the process. You’ll only confuse yourself (or even worse - confuse your dog) if you start off right away with your dog.
I like to teach the Front Cross using four literal steps. You’ll take four steps: Step forward, pivot, step back, and step forward.
Let’s start first with our imaginary dog:
- Step ahead and slightly in towards your dog with the leg closest to the dog.
- Pivot on the ball of the foot you just stepped forward with so your body starts to turn towards your dog and take a step backwards with your other foot. Now you should be directly in front of your dog's path and almost facing your dog.
- Lift your pivot foot, continue rotating your body and step far backwards with your former pivot foot. At this point you are almost facing forwards again.
- Finally complete your rotation and step forward with your back foot. At this point you are facing the same direction as you started and your dog should be on the other side of your body.
The pictures below show the handler position after each step for Front Crosses to the handler’s right and left. Imagine the dog is moving forward and his nose is right where the finger of my lead arm is pointing.
| Step | Dog On Handler's Left | Dog On Handler's Right |
|---|---|---|
| Starting Position | 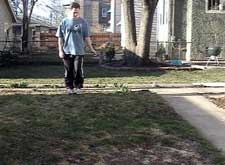 | 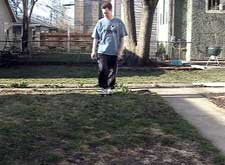 |
| Step 1 | 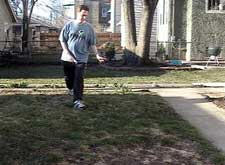 |  |
| Step 2 | 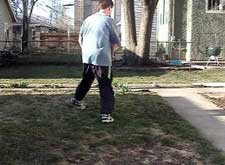 | 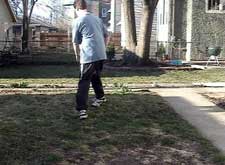 |
| Step 3 | 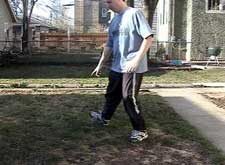 | 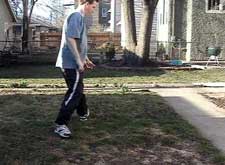 |
| Step 4 | 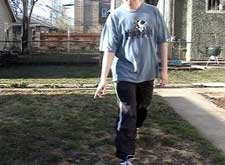 | 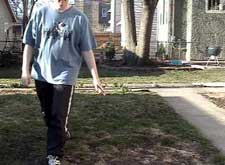 |
Here are videos (from 2005!!) of the steps to help clarify:
The aspect of the Front Cross that “seems wrong” to the beginner is that you turn towards your dog to initiate the cross. At first it can feel unnatural. But it just takes some practice and it will come to you. I know when I first learned I almost had to be turned by my shoulders to get me to turn the right direction.
Add Your Arms
Once you can execute the footwork you should work on the handwork. In this drill the handler is using the Front Cross to change from one side of the dog to the other. This is also called changing from one Handler Lead hand/arm to the other Handler Lead hand/arm. So the last piece of the cross you need to think about is which arm to “stick out” and when. I don’t mean to make a big deal about this. Basically you want your hand to point to your dog’s nose throughout the cross. Take a look at the photos above to see my hands at each step.
For some handlers this is best learned by passing a cookie from one hand to the other. You’ll start with the cookie in the hand nearest your dog and as you take your second step you’ll start transferring the cookie to you other hand. At the third step you’ll have your other hand extended with the cookie.
Add Your Dog
Please only add your dog when you can do the steps without consciously thinking about them. I like to begin by having the handler and dog start from a standing stop. This almost guarantees that you can get and stay ahead of your dog. If you let your dog get ahead of you at the first step you are doomed :^) The good news is that once you’ve started that second step you are almost guaranteed to stay ahead of your dog.
Start with a very high value treat or toy in your hand closest to your dog. You’ll use this treat to help you stay ahead of your dog, keep your dog aware of your lead hand, and reward your dog for following your lead hand. That treat/toy is serving triple duty!
As you go through the four steps you’ll keep your treat arm directly in front of your dog. If your dog starts to forge ahead as you take that first step use your treat hand to hold your dog back - the smell of the treat should keep your dog focused more on your hand than whatever is distracting them (my dogs end up nibbling on my fingers the whole time). You may find that keeping a treat in each hand and giving up the treat after your first step is easier. Then you can use your other hand (your new lead hand after the cross) to lure your dog through the cross.
Once you’ve done this successfully a few times you should be able to get rid of the first cookie and only reward your dog with a cookie from your final lead hand at the end of the cross. I like to use cookies for this drill with novice dogs for a number of reasons: it keeps your dog focused on you and your hands and gets your dog used to being close to you while you move. It also helps make you the most interesting thing on the course and reinforces the notion that you are the source of all good things - like cookies and toys.
The photos below show the four steps with our dog Mr. Peabody.
| Step | Dog On Handler's Left | Dog On Handler's Right |
|---|---|---|
| Starting Position | 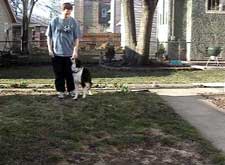 |  |
| Step 1 |  | 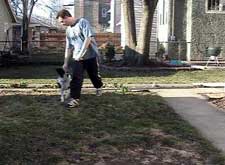 |
| Step 2 | 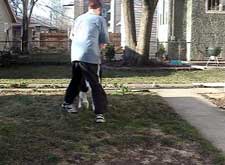 | 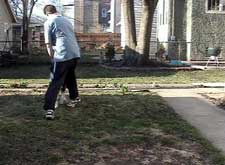 |
| Step 3 | 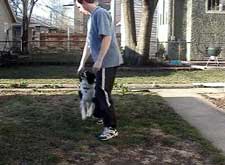 | 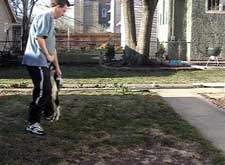 |
| Step 4 |  | 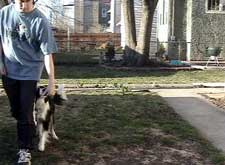 |
Here are videos (from 2005!!) of the steps to help clarify:
Once you can Front Cross to each side you start work on performing them back to back. You can chain the crosses right then left then right then left over and over. You should be able to work your way down your yard or practice field in a straight line changing from one side of your dog to the other.
I’ve focused on Front Crosses where you change from one side of your dog to the other. Once you can do those; a Front Cross used to turn your dog is even easier. I’ll cover that and some Front Cross drills in a future article.
I hope this article helps you get started with Front Crosses. Please let me know if you have any questions or comments.
If you enjoyed this article won't you please:  Thanks!